
Master the Best Foam Rolling Techniques for Faster Recovery
Waking up the day after a heavy leg day or a long run, unable to walk down the stairs without wincing, is a common problem among fitness enthusiasts, whether beginners or professionals. While many gym-goers own a foam roller, it often gathers dust in the corner or is used incorrectly, rolling back and forth rapidly without purpose.
Foam rolling, or self-myofascial release (SMR), is the perfect, simple antidote to muscle tightness and delayed onset muscle soreness (DOMS). By mastering specific foam rolling techniques, you can turn a passive plastic cylinder into an expert-level tool for faster physical results.
This guide covers the essential best practices, safety rules, and a step-by-step breakdown of beginner exercises to target your major muscle groups.

Jump To:
- What is Foam Rolling?
- Foam Rolling Techniques & Best Practices
- Essential Beginner Foam Rolling Exercises
Key Takeaways
- Go Slow: Rolling too quickly prevents the muscles from relaxing; aim for 1 inch per second.
- Avoid Danger Zones: Never roll directly on joints, bones, the lower back, or the neck to prevent injury.
- Consistency is Key: Mastering these specific foam rolling techniques accelerates recovery and reduces muscle tension.
What is Foam Rolling?
At its simplest, foam rolling is a form of self-massage that applies pressure to the fascia (the connective tissue surrounding muscles) and the muscles themselves.
Think of your muscles like a tangled rope. Stretching pulls the rope tight, but it doesn’t always untie the knots. Foam rolling acts like a rolling pin, smoothing out these “knots” (trigger points) and encouraging blood flow to the area to aid recovery.
Foam Rolling Techniques & Best Practices
Before you hit the floor, you must understand the “Rules of the Roll.” Using a foam roller incorrectly can actually cause more inflammation or injury.
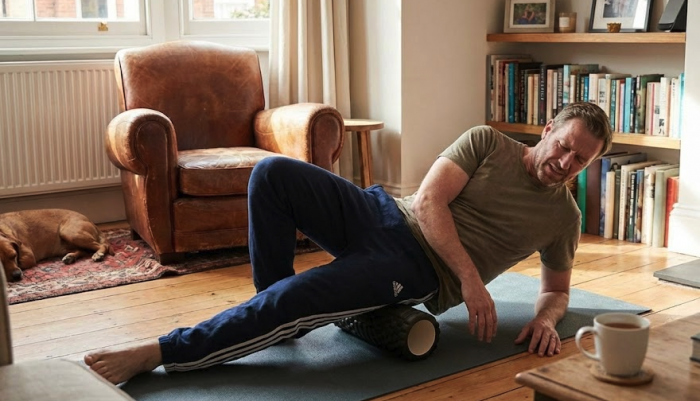
1. Speed: One Inch Per Second
Speed is the most critical technical element. Go slow.
As you move along the muscle, aim for a speed of roughly one inch per second. Rolling too quickly prevents the muscle tissue from having enough time to relax and release the tension. You need to give your nervous system time to reduce the muscle’s “tone”.
2. The Danger Zones
Are there any muscles you shouldn’t use a foam roller on?
To ensure safety, avoid rolling on joints, bones, the lower back, and the neck.
- Joints & Bones: Rolling directly over knees or ankles can stress the joint capsule.
- Lower Back: Your lumbar spine lacks the structural protection of the rib cage; rolling here can cause muscles to spasm to protect the spine.
- Neck: The cervical spine is delicate; use a massage ball or manual therapy for neck tension instead.
Essential Beginner Foam Rolling Exercises
Here is how to target the major muscle groups effectively with the best foam-rolling techniques.
1. Quads (Front of Thigh)
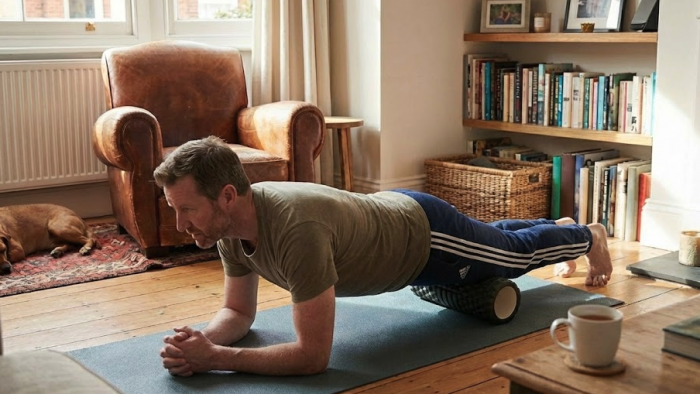
- Starting Position: Lie face down with the foam roller under your thighs, just above your knees. Support your weight on your forearms (in the plank position).
- The Motion: Slowly roll your body backwards so the roller moves up towards your hips.
- Technique Tip: To increase pressure, stack one leg on top of the other.
2. Hamstrings (Back of Thigh)
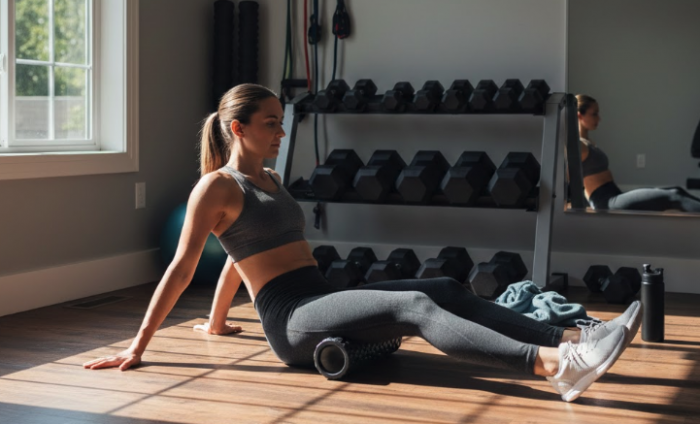
- Starting Position: Sit on the floor with your legs extended and the roller positioned under your hamstrings. Place your hands on the floor behind you for support.
- The Motion: Lift your hips off the floor and slowly roll from the bottom of your glutes down to just above the back of the knee.
- Technique Tip: Rotate your legs slightly inward or outward to hit different fibres of the hamstring.
3. Glutes (Hips/Bum)
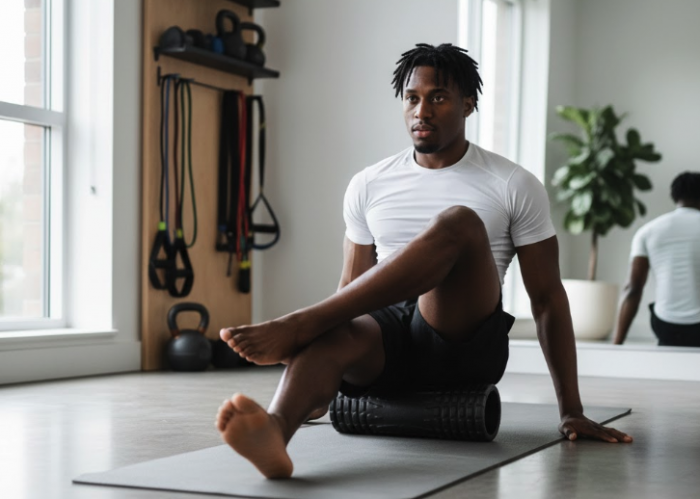
- Starting Position: Sit on the roller. Cross your right ankle over your left knee (Figure 4 position).
- The Motion: Lean your weight onto the right glute. Roll back and forth slightly to find tight spots.
- Technique Tip: This is excellent for indirectly relieving lower back tightness.
4. Calves
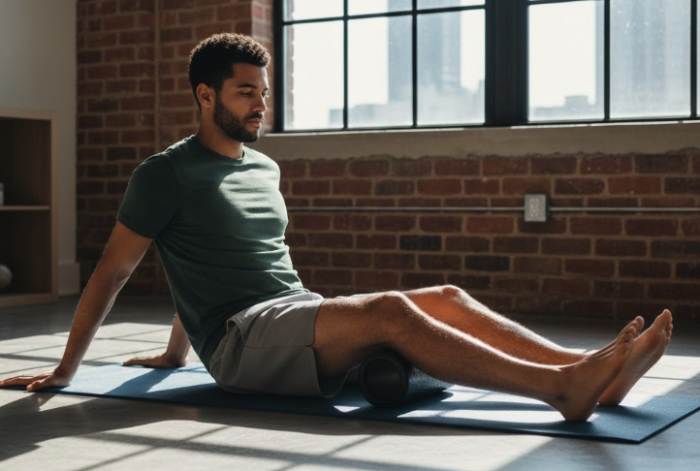
- Starting Position: Sit with legs extended, roller under your calves. Hands behind you on the floor.
- The Motion: Lift your hips and roll from the ankle up to just below the knee.
- Technique Tip: For deeper pressure, cross one leg over the other.
Master your recovery with FitKit UK
Proper foam rolling is about precision, not speed. By following the “one inch per second” rule and avoiding danger zones like the lower back, you can effectively manage muscle tension and recover faster.
Now that you have mastered the technique, ensure you have the right equipment. Shop our collection of high-density foam rollers and recovery tools. For a more personalised guide to the best foam roller for your needs, make sure to read our blog, where we break down specific foam rollers.

Comments are closed here.